Bathroom Tile Shower Shelves & Recessed Shampoo Niches 1234 Email me!
|
.JPG)
Recessed Niche and Ceramic Shelf Installations
_____________________________________________________________________________
Ceramic niche install by Evan Daniels at Rainier Remodeling serving Fairfax, VA and surrounding area for your kitchen and bathroom needs.
EZ install niche Install
 *
* *
*
.JPG) *
* *
*
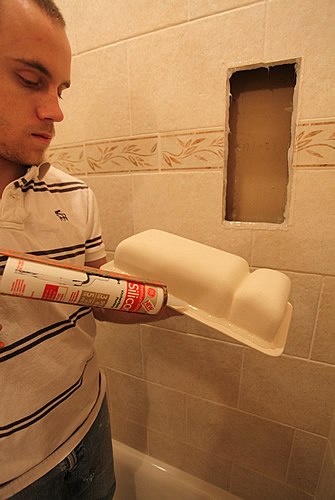
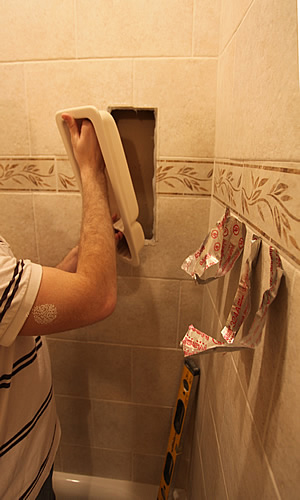
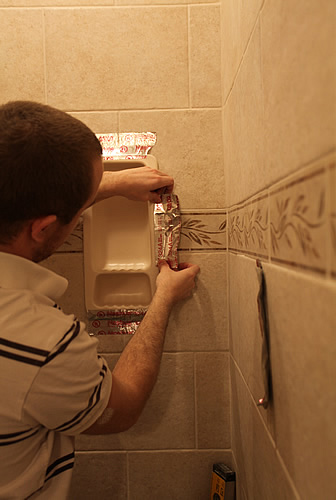
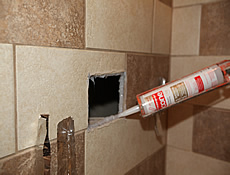
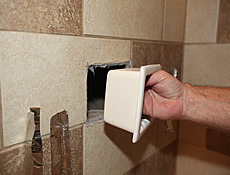
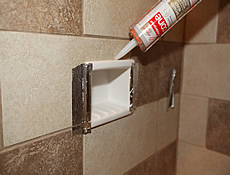
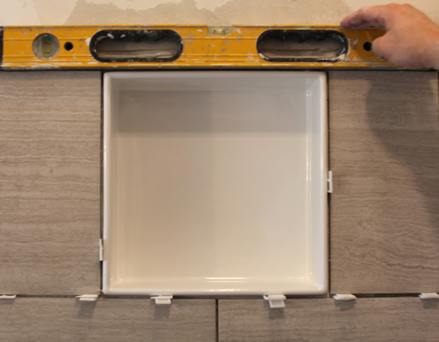
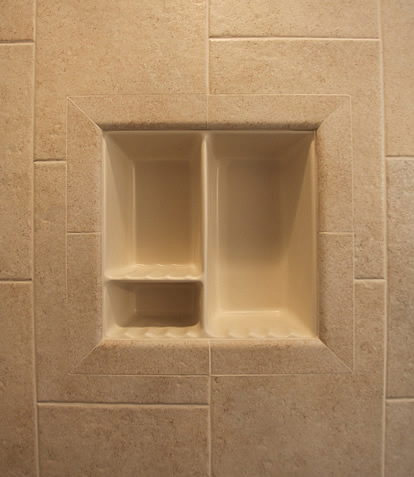
Small two compartment niche install, all recessed flanged niche installs are basically the same. Try not to get ooze out of silicone from flange before tape up. Final silicone next day.
Click here for youtube link to this install along with the tile setting time lapse
Installation is fast and easy. Sanitary, easy to clean. No grout lines
No framing needed, make sure your backer is secure. Unit floats with tile wall.
In a custom niche there are between 5-10+ft of grout line. There are none in our niches, with no potential for leaking.
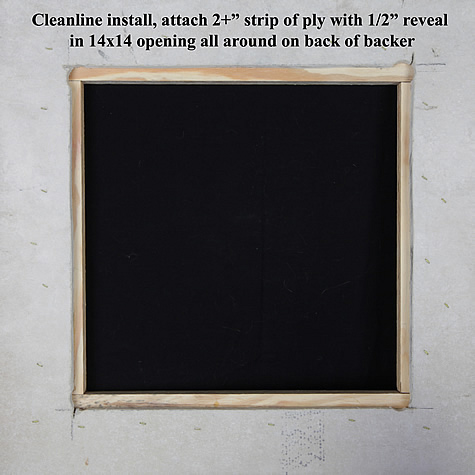
Clean line shower niche install instructions
 ____
____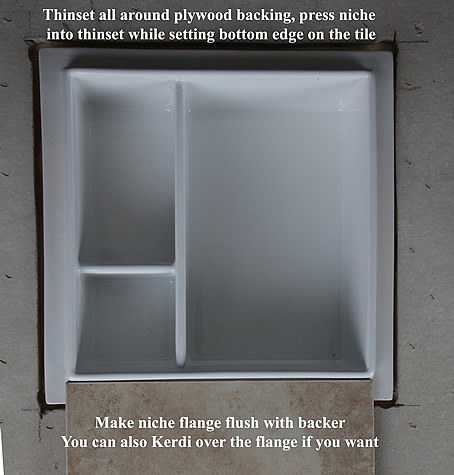
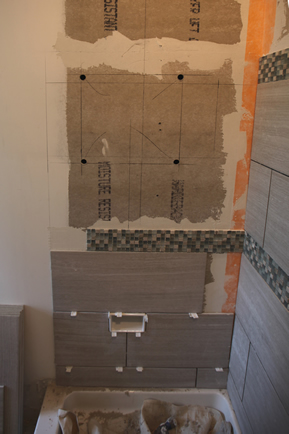
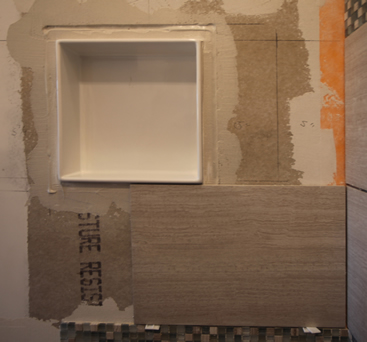
1.Tile up to where the clean line is going, then cut the hole. No special framing needed.
2. Draw grout lines up wall so you can hit layout with the niches' bead.
3. Cut hole 1/8" bigger than outside of flange ( so you can pump thinset around unit).
4. Clean line niche's flange will stand on the edge of the backer board, level.
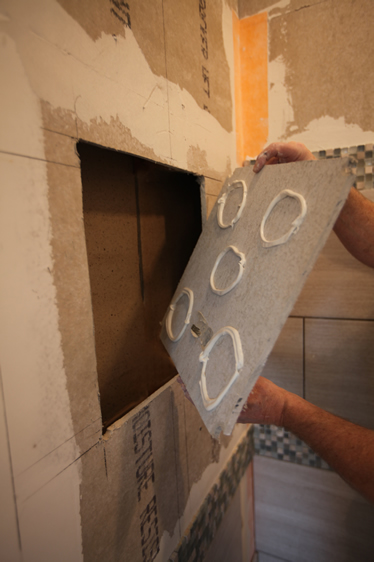
5. Attach backer strips all around with approx 1/2" reveal to receive thinset
6. Mud thinset on to reveal area and set cleanline niche into opening and on to tile.
7. Adjust and secure niche so flange is flush with backer board.
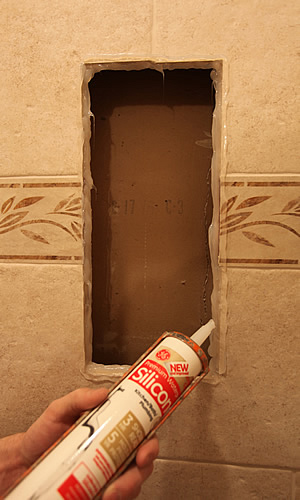
Retrofit niche or shower shelf installation in existing tiled walls
 *
* *
* *
*
Use this technique to retrofit any of my recessed niches or even shower shelves. Works best with flanged units. Many of the surface shower shelves "cover the cut" when installed.
Foot rest or soap dish can be installed or retrofitted in existing showers, best to know stud and pipe locations. Cut out dimensions 5 3/4"x 4 1/8".
Installation of the surface shower shelves
All non recessed shower shelves must be attached to backer board with thinset and siliconed in. None of my shelves are meant to be attached just to the surface of tile.
Bed in min 1/8" thinset to backer board
Don't rub metal tools against surface
Level, aluminum tape overnight
Neat silicone edge next day
Shower-shelf.com Mark 703-408-4920
Opinions backed by 40 years remodeling DanielsKitchenBath Mark 703-408-4920
Clean line shower niche install instructions
1.Tile up to are where the clean line is going, then cut the hole. No special framing needed.
2. Draw grout lines up wall so you can hit layout with the niches' bead.
3. Cut hole 1/8" bigger than outside of flange ( so you can pump thinset around unit).
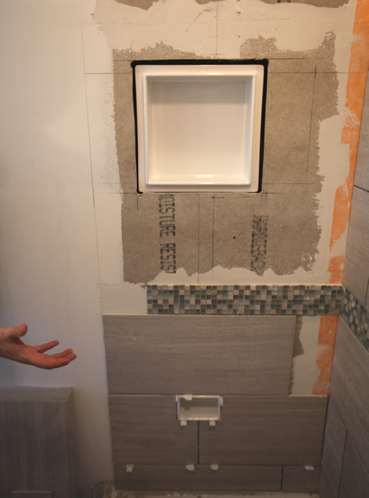
4. Clean line niche's flange will stand on the edge of the backer board, level.
5. Glue spacer on back of clean line to rest against opposing wall, ( I don't glue as I want the niche to float with the tile work rather than being tied to opposite wall, cracking)
6. Mud unit into opening also setting tile at same time, adjusting as needed.
Various niche and shower shelf install pictures below
*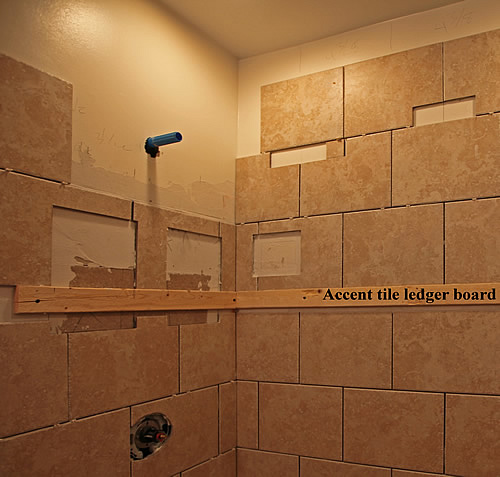
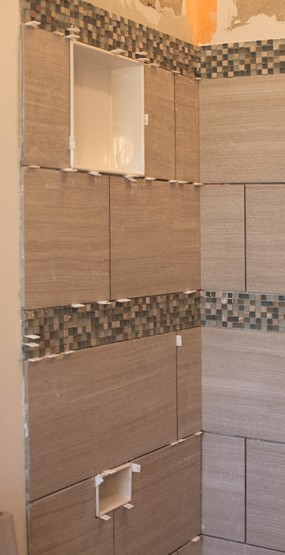
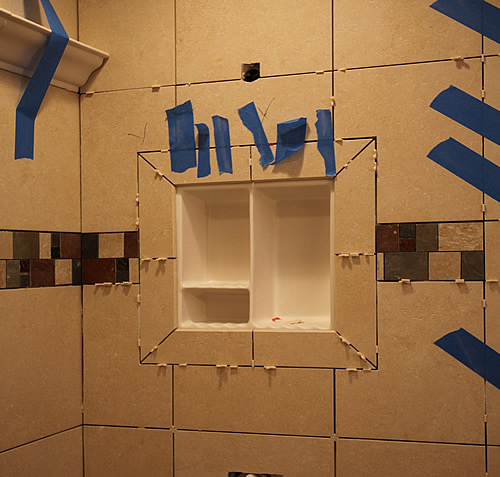
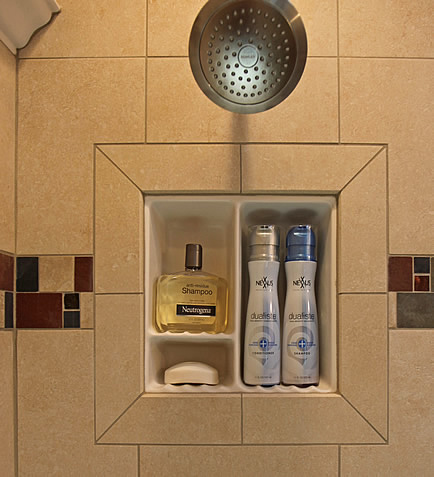
Recessed niches, soap dish and accent strip set comfortably at approx eye level. Notice niche holes are cut out after porcelain tiled is set. No special framing needed, niches set on edge of backer board and tile.
**
**
Small two compartment niche install, all recessed flanged niche installs are basically the same. Try not to get ooze out of silicone from flange before tape up. Final silicone next day. Click here for youtube link to this install along with the tile setting time lapse
 *
*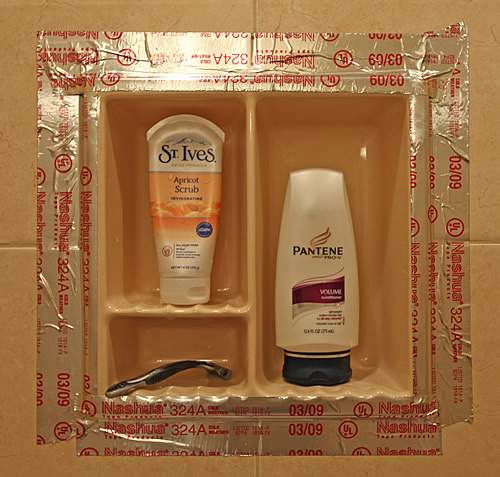
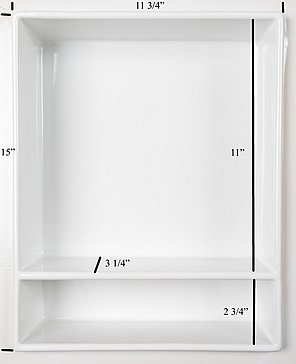
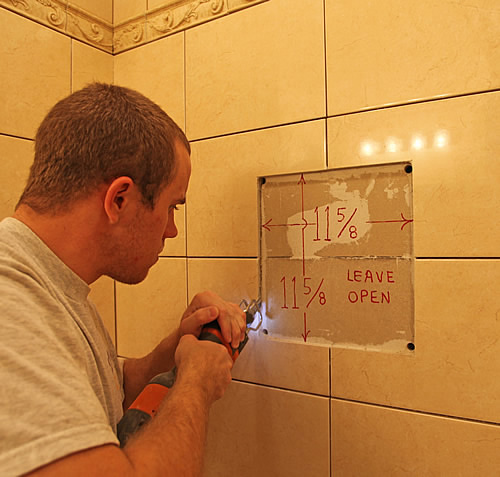
You can cut out to 11 3/4" x 11 3/4" as one customer claimed 11 5/8" was too tight. Three compartment porcelain niche taped up with aluminum metal duct tape ( a little overkill on the tape) shown in Gloss Parchment color.
 *
*
Above is a niche install with bull nose applied over the tile flange on the niche. Still a lot easier install than a full custom niche install with no interior grout lines.
*
Another full overlay niche with bull nose, 3 compartment color is matte almond.
Click Here for Youtube photo series of this install
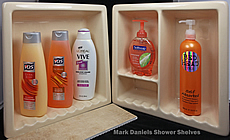
Customer Installed Bathroom Shower Niches and Shampoo Shelves

Nice centered soap under 1 compartment that holds 3-32 oz shampoo bottles
Installation of crown (surface) shelves
Leave opening in tile for back step of shelf to fit into. ( cuts are covered)
Thinset shelf to opening, level and tape with aluminum tape, not weak tape.
Set over night, carefully remove sticky tape, neatly caulk with silicone at edge.